What’s the difference between the Large & Small OG Spring Sizes?
The Large & Small both do the same exact thing when it comes to the effects they have on plants and both are set up in the same way. The differences are the trainable length of wire (the distance between the end coils – 28” for the Large & 14” for the Small) and what they are best suited for.
The Large OG Spring works well for training a wide range of plant sizes in Veg & is perfect for Autoflowers. It will support up to about 3-5 weeks of training time depending on genetics & environmental conditions.
The Small OG Spring is great for training smaller plants (1-3 weeks of training time) and because of their compact size, they work well in situations that call for higher plant densities. Examples of this would include a Sea of Green approach, where veg time is short & plants are being flowered in 3-5 gallon pots, or in raised beds. They’re also great for training individual tops in early flower.
**The more aggressive the secondary training is with the branches, the longer you can train along the Spring wire, which is true for either size Spring. Secondary Training can include ScrOG, Trellis, Stakes, Yo-Yos, a variety of LST techniques, Cages and even more Spring Training.
What size of stake can I use? Do I need a certain kind?
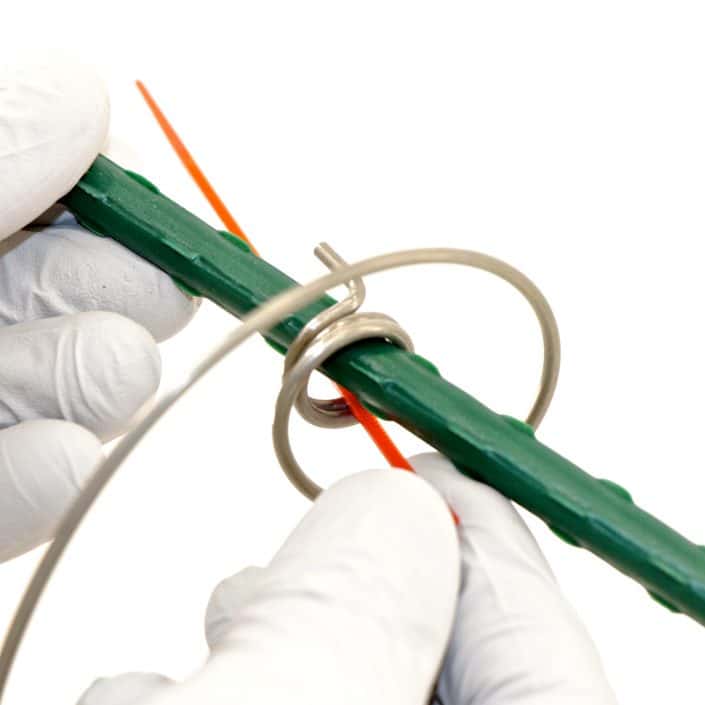
The coils are ½” inside diameter. I recommend using stakes 7/16” or less in dia. So you can slip a zip tie between the stake and spring coil. Most stakes up to 6’ will work.
The OG Springs™ Design allows for the use of a variety of types of stakes appropriate for garden use. The spring was equipped with coiled ends on each end so that a Bamboo, plastic coated steel or wood dowel with ½ or less diameter can get the job done. Plastic Coated Steel are our preffered choice (2ft x 3/8″ Dia. plastic-coated steel stakes) They’re easy to clean & last a long time and can be found at most home Hardware Stores & Hydroponics Stores.
What can I use to Attach the Spring to the Stake?
Many of the smaller size cable ties will work well for securing the Spring to the stake with releasable options being great for reuse. Garden Soft tie can also serve as a alternative to cable ties, simply slip it between the stake and Spring’s coil and twist down the ends to ensure a tight grip.
What can I use for Attaching the Plant to the Spring?
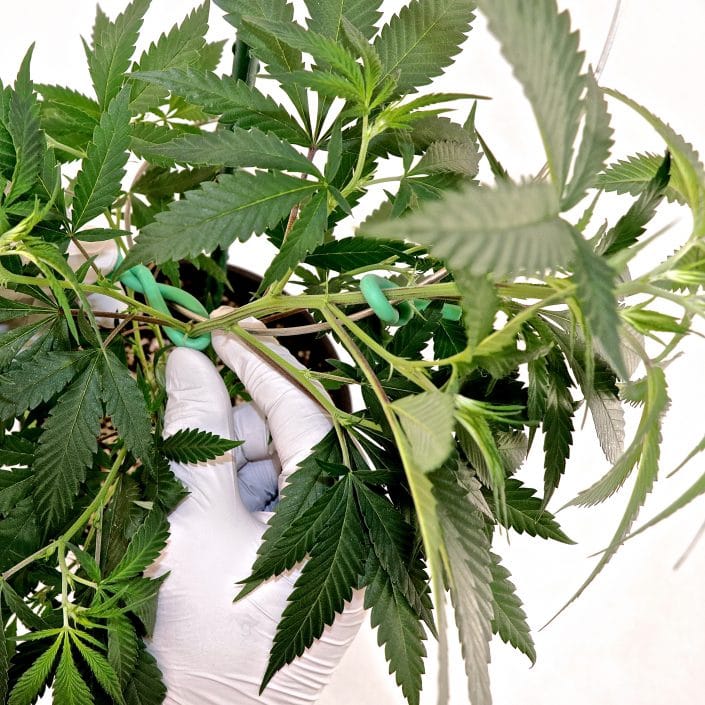
When it comes to tying down the stem to the spring there is a number of options. Our favorite is Garden Soft Wire. It has a good amount of cushioning and excellent memory to hold where you want it and is reusable. There is also garden twist ties, pipe cleaners, string, various garden clips and so on. Most all of these will work well provided you allow for some slack between the stem and the Spring wire. We like to leave a pencils width of slack between the two.
How Do I Avoid Damaging Roots When I Set the Stake?
It is very easy to avoid root damage and the key is setting the stake at the right time. Setting up the stake early can ensure that there’s absolutely no roots in harms way when placing it. By setting the stake in the new medium at the time of transplant you eliminate any possibility of damaging roots. You don’t even need to set up the spring at the same time if your wanting to wait to start training. The roots will start to colonize the new medium while stabilizing the stake at the same time.
Generally, we set the stake when transplanting from a pint container to a 1,2 or 3 gallon pot. And most of the time we set up our stake & Spring at the same time.
When Should I Start Training My Plant?
I generally recommend starting Spring training when the plant is approx. 4-5 weeks old. That time frame includes starting from seed or from a clone, but either way it should be well rooted and the entire plant should be growing vigorously. Depending on the strain you’re growing, that puts most plants between 6″-14″ tall.
Here’s an Example of Our Typical Veg Transplant Time Line:
- Day 1 Take Clones,
- Day 12-16 Transplant Clones to Pint Containers (Solo Cups),
- Day 24-28 Transplant Pints into 1 0r 2 Gallon Pots.
- Day 24-35 1st Spring Training Session.
Often we Transplant, Set Up & Train all in one visit. You’ll notice this in most of our time lapses.
What is the Easiest Way to Get Started Training with Springs?
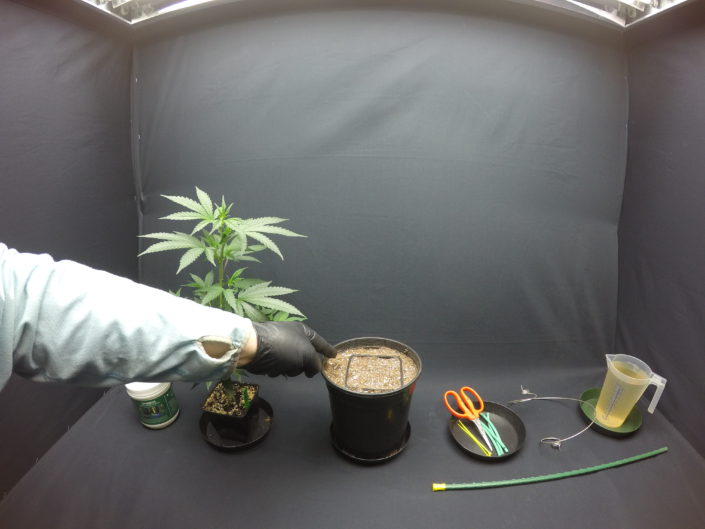
Our favorite method combines Transplanting, Setting the Stake/Spring, & Training the Plant in 1 Session. Combining them saves you time and quickly transforms your plant from a “Christmas Tree” into a Sturdy Bush. You’ll also ensure that no root damage occurs when setting the stake as you can clearly see where the root ball and new medium meet.
Watch The Time Lapse Video Below for 3 Different Views of the Step-By-Step Process.
What Do I Do After The First Training Session?
After the first training session you’ll want to come back and check on the plant in 24hrs. If you check in 2-4 hours it’s likely you’ll see a plant that has adjusted to her Spring life very nicely.
After 24hrs you might see something that needs adjusting,
- Like a soft tie too loose or too tight,
- Or you need to add a tie down or take one off
- Make sure the stake is stable & as vertical as possible
- Make sure the Spring & the plants main top is angled upward between 35-45º
What Do I Do As The Plant Grows?
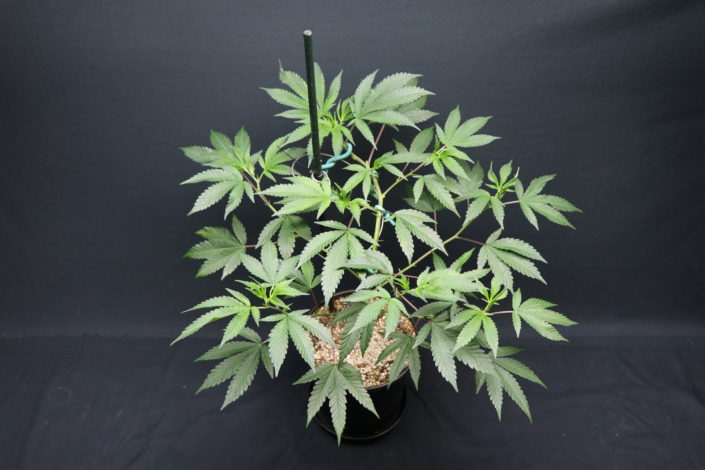
As your plant grows you’ll need to decide when to tie the Apical Meristem “main top” back down to the Spring. If we’ve done a good job on the plants first attachment to Spring you don’t usually need to tie the main top back down for at least 4-7 days. As the plant grows faster you’ll need to tie down the main top more frequently. Once you’ve trained your plant into a bush, you’ll want finish up training by attaching the main top all the way down to the spring. This basically shuts off dominance in the main top so that it behaves like the other tops.
Can You Tell Me More About How Apical Tuning™ Works And What to Look For?
Apical Tuning™ in it’s simplest form maintains some dominance in the main top until training is complete. It’s a gradual process whereby the dominance is slowly redistributed throughout the plant. So after the first training to the Spring you’ll want to see the main top turn up and be slightly higher in elevation than all the other shoots on the plant.
The reason for this is to avoid having the dominance shift toward the lower shoots too quickly and having a lower branch become the dominant leader.
Once the plant turns back up and you can see that the main top is still dominant, and if it is not, you can adjust the tie downs to make sure that it is above all other shoots. We generally give it a few days before doing any additional training so you can see what changes are taking place. Keep an eye on the main top to see when it starts to out pace the middle and lower shoots again, which is a good indicator of when to tie it back down to the Spring. Each follow up training is similar to this, making sure to keep the relationship between the main top and the lower shoots the same until you are done training your plant. At which point you’ll want to pull the apex down slightly below the the lower shoots, effectively turning it off in a way that takes the last bit of dominance out of the main top so that it is one and the same as all the other tops on the plant.


